
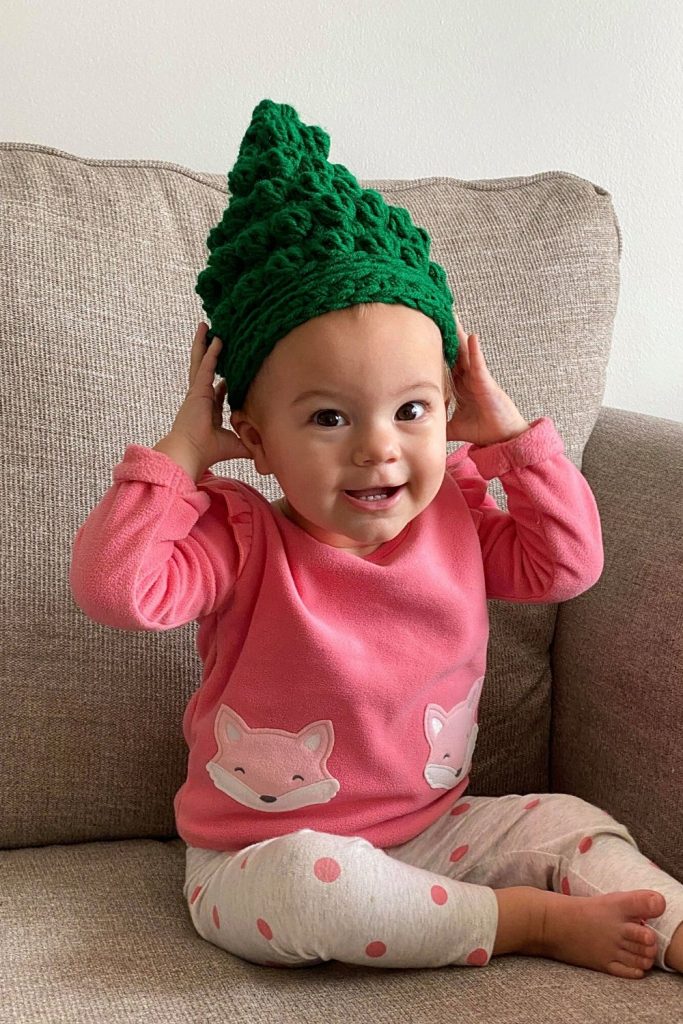
Bobble Christmas Tree Beanie – Free Pattern
Get into the holiday spirit with this delightful Christmas Tree Beanie crochet pattern! Designed for festive gatherings and chilly winter outings, this beanie features a playful Christmas tree motif that’s both stylish and cozy. Perfect for holiday gifts, seasonal markets, or simply adding some cheer to your wardrobe, this pattern is quick to make and easily customizable. Whether you’re an experienced crocheter or a beginner looking for a fun holiday project, this beanie is sure to bring joy to your crochet hooks!

No time to Make it Today? Save to Pinterest!
Click your favorite image, below, and save to your Pinterest board or share with friends.


Bobble Christmas Tree Beanie
The inspiration for the Christmas Tree Beanie came one snowy December afternoon as I was prepping for an upcoming holiday craft fair. I wanted to create something unique and festive that would bring a smile to people’s faces, especially kids and those who love the holiday season. After a bit of trial and error, the Christmas Tree Beanie was born.
Since its debut, this beanie has become a holiday favorite in my shop, adored by customers and family alike. I love seeing the joy it brings when worn, especially around Christmas time! It’s a versatile pattern that allows for creativity—think colorful “ornaments” on the tree or even a sparkling star on top. This beanie is not just a hat; it’s a celebration of the season!
If you enjoyed last year’s Oh, Bobble Tree decor pattern, you’re going to love this wearable interpretation!
Why you’ll love this Christmas tree beanie

The pattern shared, below, is for the Youth (ages 5-12) size. Additional sizes, including infant, toddler, child, youth, teen/women, and men’s, are available in the premium pattern.
Skill Level
Intermediate
Materials
- Red Heart Super Saver, worsted weight #4 yarn (100% acrylic; 364 yds/333 m per 7 oz/198 g skein); 1 skein Paddy Green
- 9.00 mm (M/N) Crochet Hook
- Scissors
- Latch hook or sewing needle
- embellishments, as desired
- Printable PDF Pattern for the Oh, Bobble Tree Beanie
Gauge
Should measure approx. 2.75″ in diameter and 3.75″ tall after 7 rounds.
Size
Youth (ages 5-12): 19.5-20″ head circumference (included below, free)
Also available in…
Infant (6-12 mos): 15-16″ circumference
Toddler (1-2 years): 17-18″ circumference
Child (2-5 years): 18.5-19″ circumference
Teen/Women’s: 21-22″ circumference
Men’s: 23″ circumference
Stitch Abbreviations
beg – Beginning
BS – Bobble stitch
CH – Chain
DC – Double Crochet
HDC – Half-double Crochet
HDC2TOG – Half-double Crochet decrease
RND – round
SC – Single Crochet
SLST – Slip Stitch
st(s) – Stitch(es)
YO – Yarn Over
Pattern Notes
- Skill Level: Intermediate, US Terminology
- Beginning CH-1 of a round does not count as a stitch.
- To make your bobbles really pop, be sure to work the subsequent SC tightly.
- Stitch counts are shown at the end of each row, in parentheses.
- This pattern is worked with three stands of yarn held together. The easiest way to do this is by using 3 skeins of yarn. For infant – youth sizes, you can use 1 skein and separate it into 3 balls of 120 yards each.
- Work the pattern through for Men’s size. Follow notes in pattern for finishing smaller sizes.
- Join each round with a SLST to beg st of RND.


Special Stitches
Bobble Stitch (BS): A set of 3 unfinished dcs, worked into the same st, and finished all together to form one st.
To make a BS:
YO, insert hook into next st and pull up a loop, YO, pull through two loops (two loops remain on hook),
YO, insert hook into same st and pull up a loop, YO, pull through two loops (three loops remain on hook),
YO, insert hook into same st and pull up a loop, YO, pull through two loops (four loops remain on hook),
YO, pull through all four loops on the hook.
Note: normally, a bobble stitch will be popped toward the back. Since this piece is worked in the round, our bobble will be popped to the front. (I know it’s unorthodox, but it works!)
Upgrade to the Ad-free PDF
Upgrade to the premium, ad-free pattern for all sizes from infants to adults!
A Note to Ewe: I’m so excited to share this incredible pattern with you! All you need to do is click the box below to unlock this subscriber-only design for free. Simply add your best email and create a password.
This pattern is a gift to you. All I ask is that you don’t copy, paste, or distribute it to others…but feel free to share the link to your favorite social media platform or via email to a friend.
Prefer an ad-free experience? Scroll to the button, below, to purchase the PDF online for just a small fee. I so appreciate your willingness to support the work of Made with a Twist and other independent designers. You make all the work worthwhile and I can’t wait to see your finished design!
How to Get the Ad-free PDF of this Design
The pattern instructions are available, above, but you can get the beautifully formatted, printable, ad-free PDF for just a few dollars in our Ravelry and Etsy shops. (edit links on buttons)
Suggested Pricing: A Guide for Crochet Sellers
Permission is given (even encouraged) to sell your handmade products created from this original Made with a Twist pattern. I only ask that you give credit to Pam Grice from Made with a Twist as the designer, when possible or appropriate, and link back to www.madewithatwist.com and/or @madewithatwist (on social media) when selling and sharing images online.
Suggested Retail Price

Want your own Crochet Product Pricing Calculator? Well, You’re in luck. You can access a calculator for Crochetpreneur for free RIGHT HERE.
You’ve Got Your Pattern, Now What?

Copyright Notice
Copyright notice: This pattern and its images are copyright protected and the sole property of Made with a Twist by Crochetpreneur®, a division of Montgomery Grice Enterprises, Inc. Please do not redistribute, transfer, or sell the pattern, or alter it to claim as your own You may sell any products you create from this pattern. Please credit the designer by linking online listings to www.madewithatwist.com or tagging @madewithatwist.
I love seeing your finished projects! If you enjoyed making the Jolie Button Scarf, I’d love to see yours on Instagram. To be sure I don’t miss it, please tag me, @madewithatwist, when you post your photos!


