Chunky Shell Stitch Beanie: Free Crochet Pattern
Are you looking for a cozy and stylish winter hat pattern that’s quick and simple to crochet? This chunky shell stitch beanie is the perfect project for beginners and seasoned crocheters alike! Using thick, cozy yarn and an easy-to-master shell stitch, this beanie adds warmth and style to any wardrobe. Whether you’re making one for yourself or as a thoughtful handmade gift, this pattern is a go-to for winter crafting.

No time to Make it Today? Save to Pinterest!
Click your favorite image, below, and save to your Pinterest board or share with friends.

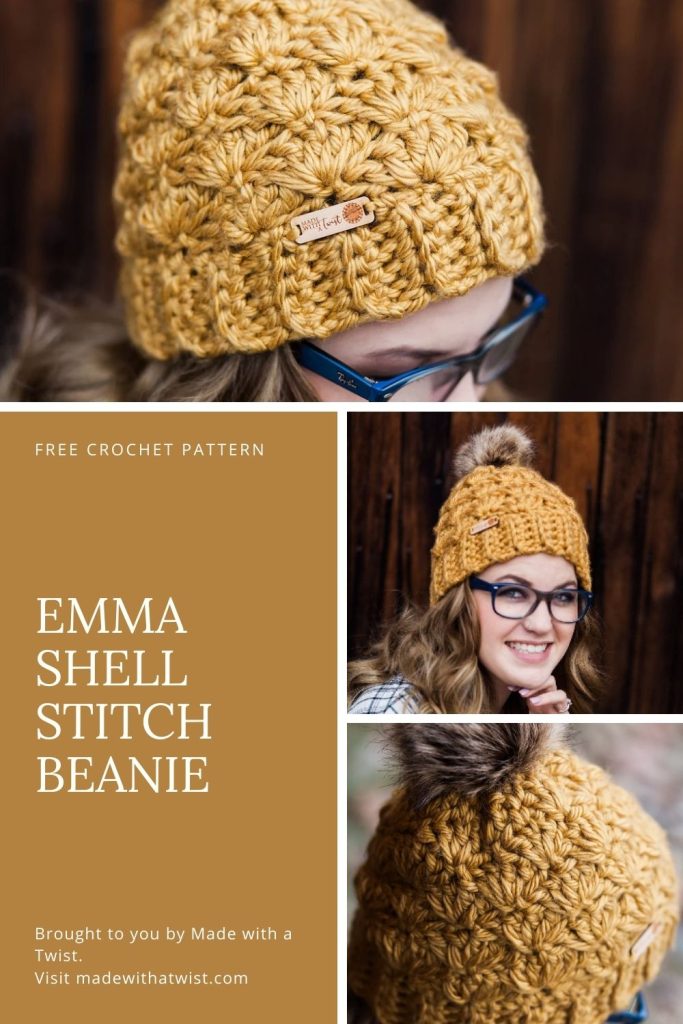
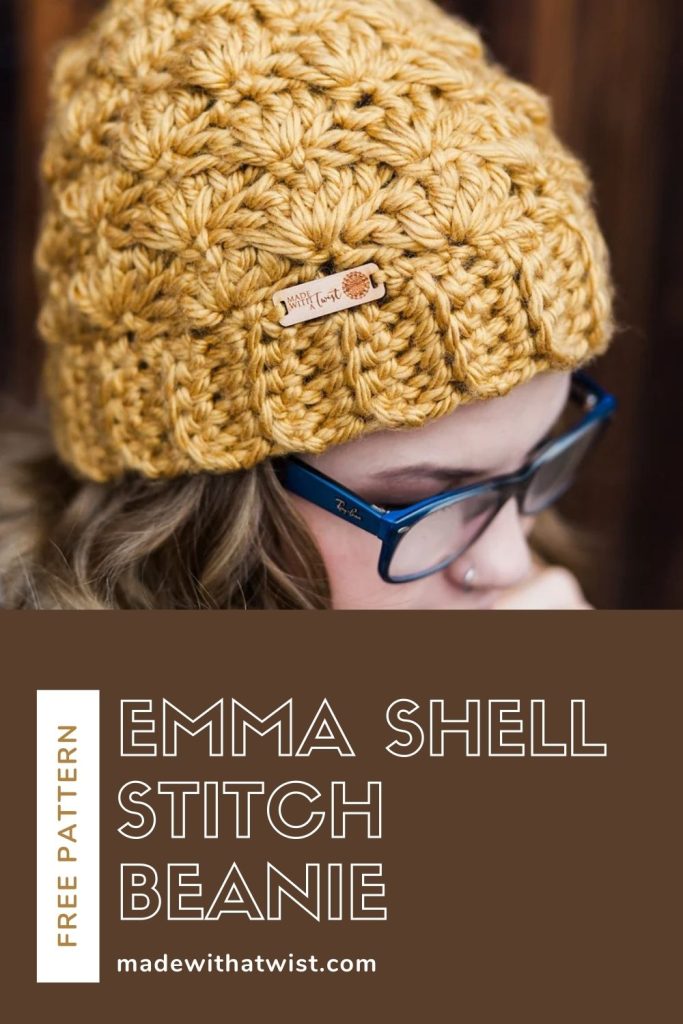

What Makes the Shell Stitch Beanie so Special?
The shell stitch is not only visually appealing but also incredibly easy to work with. The textured pattern gives the beanie a unique and cozy look that stands out. Plus, working with chunky yarn means you’ll have a finished product in no time! This beanie is ideal for anyone looking to add a stylish and functional item to their winter wardrobe.
Step-by-Step – How You’ll Work Your Beanie Project
Creating this beanie is easy, even for those new to crochet! Follow the steps below for a smooth and fun crafting experience:

Shape the Crown: As you near the top, decrease stitches to shape the crown and give the beanie a fitted look.
Start with the Brim: This will give structure to your beanie and make it snug and comfortable.
Work the Shell Stitch Pattern: The shell stitch is a simple combination of stitches that adds depth and texture.
Pro Tips for Working with Chunky Yarn
Keep Your Tension Even: Chunky yarn can sometimes be tricky to manage, so keep your stitches relaxed.Mind the Yarn Splitting: Some bulky yarns can split easily, so watch your hook placement.
Why This Beanie Make the Perfect Handmade Gift
There’s something truly special about a handmade gift, especially when it’s as cozy and stylish as this beanie. The chunky shell stitch gives a sophisticated touch, making it a beautiful present for friends and family. Plus, it’s quick to make, so you can create multiple in different colors to suit everyone’s style.
Whether you’re a beginner crocheter or a seasoned pro, this chunky shell stitch beanie pattern is a must-have for your winter projects. With its easy textured design, cozy fit, and quick results, it’s sure to become one of your favorite go-to patterns.
Grab your favorite yarn and let’s dive in!
Why you’ll love this chunky winter hat

Skill Level
Easy/Intermediate (includes increases)
Materials
- Lion Brand Hometown USA, super bulky weight #6 yarn. (100% acrylic, 81 yds/74 m per 5 oz/142 g skein)
- 90 – 95 yds in the color of your choice
- 10.00 mm (M/N) Crochet Hook
- Scissors
- Sewing needle
- Pom pom, tassel, or buttons (optional)

Size Included Here
One size fits most teens/adult women (19″ – 21″ circumference)
Stitch Abbreviations
eg – Beginning
CH – Chain
RND – Round(s)
SC – Single Crochet
SK – skip
DC – Double Crochet
SLST – Slip Stitch
st(s) – Stitch(es)
Gauge
Gauge: 2 shell/SC repeats X 5 rows = 4” square
Pattern Notes
- Skill Level: Easy/Intermediate
- US Terminology
- Sts worked through both loops unless otherwise indicated.
- Construction: Start with rows and then work in rounds.


More Chunky Hat Patterns You’ll Love
Special Stitches
Shell Stitch (Pattern for Gauge)
Pattern used for gauge will create a 7” x 4” swatch:
CH14.
Row 1: SC in first CH from hook, SK 2 sts, 5DC in next st, SK 2 sts, SC, SK 2 sts, 5DC in next st, SK 2 sts, SC.
Row 2: CH3 (counts as DC), turn. 2DC in same st as beg CH3, SK 2 sts, SC in middle st of 5DC shell from row below, SK 2 sts, 5DC in SC st from row below, SK 2 sts, SC in middle st of 5DC shell from the row below, SK 2 sts, 3DC in last st.
Row 3: CH1, turn. SK 2 sts, 5DC in next SC st, SK 2 sts, SC in middle st of shell from row below, SK 2 sts, 5DC in next SC, SK 2 sts, SC in top CH of beg CH3 from row below.
Rows 4-5: repeat rows 2 & 3
Finish off and measure.

Upgrade to the Ad-free PDF
Support the work of Made with a Twist when you upgrade to the premium, ad-free version of this design. It even includes additional instructions for turning your beanie into a slouch hat or messy bun hat!
A Note to Ewe: I’m so excited to share this incredible pattern with you! All you need to do is click the box below to unlock this subscriber-only design for free. Simply add your best email and create a password.
This pattern is a gift to you. All I ask is that you don’t copy, paste, or distribute it to others…but feel free to share the link to your favorite social media platform or via email to a friend.
Prefer an ad-free experience? Scroll to the button, below, to purchase the PDF online for just a small fee. I so appreciate your willingness to support the work of Made with a Twist and other independent designers. You make all the work worthwhile and I can’t wait to see your finished design!
Emma Shell Stitch Beanie Crochet Pattern Instructions
With 10.00 mm hook and super bulky yarn, CH 6.
Row 1: (working in back loop only,) SC in 2nd CH from hook, SC in each CH across, CH1, turn. (5 sts)
Row 2: (working in back loop only) SC in each st across, CH1, turn. (5 sts)
Rows 3 – 36: Repeat row 2. Do not fasten off.
With right sides together and crochet hook on right-hand side of piece, SLST last row to beg row of CH sts matching sts across. This will create a cuff.

Turn the cuff right-side out so seam is on the inside.
CH1 and work across top of ribbing. You’ll be working in rounds now.
RND 1: Working into top of ribbing and counting turning CH of each row as a st, *SC in next 5 sts, 2SC in next st, repeat from * around. Join with a SLST to beg SC. (42 sts)

RND 2: CH3, 4DC in same st as beg CH2, SK next 2 sts, SC in next st, SK next 2 sts, *5DC in next st, SK next 2 sts, SC in next st, SK next 2 sts. Repeat from * around. Join with SLST to top of the beg CH3. You will have 7 completed shells. (42 sts)
RND 3: SLST into next 2 sts, CH1, SC in the middle st of shell, *5DC in SC stitch, SC in middle next shell repeat from * around. 5DC in the next SC, SLST to beginning SC. 7 completed shells (42 sts)
Rnd 4: CH3, 4DC into same st, SK 2 sts, *SC in middle of next shell, 5DC in next sc. Repeat from * around. SC in the middle of next shell, Join with SLST to top of beg CH3. 7 completed shells. (42 sts)
RND 5: (decrease) SLST into next 2 sts, CH1, SC in middle st of shell, *4DC in SC stitch, SC in middle st of next shell. * repeat from * around. 4DC in next SC, SLST to beg sc. 7 completed shells (35 sts)
RND 6: CH3, 3DC into same stitch, *SC in middle of next shell, 4DC in next SC. Repeat from * around. SC in middle of next shell. Join with SLST to top of beg ch3. 7 completed shells. (35 sts)
RND 7: SLST into next 2 sts, CH1, SC in middle st of shell, *4DC in SC stitch, SC in middle st of next shell. * repeat from * around. 4DC in next SC, SLST to beg sc. 7 completed shells (35 sts)
RND 8: (decrease) CH3, 2DC into same stitch, *SC in middle of next shell, 3DC in next SC. Repeat from * around. SC in middle of next shell, Join with SLST to top of beg ch3. 7 completed shells. (28 sts)
RND 9: SLST into next 2 sts, CH1, SC in middle st of shell, *3DC in the SC stitch, SC in middle st of next shell. Repeat from * around. 3DC in the next SC, SLST to beginning SC. 7 completed shells (28 sts)
Last Round: (decrease) CH2, *SC into center st of next shell, HDC between shells. Repeat from * around. (14 sts)
Fasten off leaving a long tail.
Use a tapestry needle to sew the top closed.
Leaving a long tail, st a running basting st around the inside of the hat at the top edge.
Pull the tails tight to cinch the top closed. Tie off, clip and tuck ends.
How to Get the Ad-free PDF of this Design
The pattern instructions are available, above, but you can get the beautifully formatted, printable, ad-free PDF for just a few dollars in our Ravelry and Etsy shops. This premium design includes additional instructions for turning your beanie into a slouch hat or a messy bun hat!

Suggested Pricing: A Guide for Crochet Sellers
Permission is given (even encouraged) to sell your handmade products created from this original Made with a Twist pattern. I only ask that you give credit to Pam Grice from Made with a Twist as the designer, when possible or appropriate, and link back to www.madewithatwist.com and/or @madewithatwist (on social media) when selling and sharing images online.
Suggested Retail Price

Want your own Crochet Product Pricing Calculator? Well, You’re in luck. You can access a calculator for Crochetpreneur for free RIGHT HERE.
You’ve Got Your Pattern, Now What?

Copyright Notice
This pattern and its images are copyright protected and the sole property of Made with a Twist by Crochetpreneur®, a division of Montgomery Grice Enterprises, Inc. Please do not redistribute, transfer, or sell the pattern, or alter it to claim as your own You may sell any products you create from this pattern. Please credit the designer by linking online listings to www.madewithatwist.com or tagging @madewithatwist.