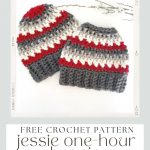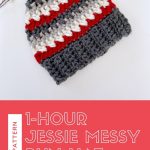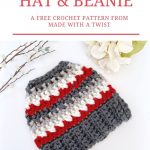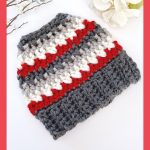
Jessie One-Hour Messy Bun Beanie: Free Crochet Pattern
Looking for a stylish and quick crochet project that’ll keep you warm while staying on-trend? The One-Hour Messy Bun Beanie is perfect for crafters who love practical yet fashionable accessories. This easy crochet pattern is designed to let you create a cozy beanie with an open top for a messy bun or ponytail—ideal for chilly days when you want to keep your hair up but still stay warm. Plus, it’s quick to make, making it a fantastic option for last-minute gifts or stocking up your craft fair inventory.

No time to Make it Today? Save to Pinterest!
Click your favorite image, below, and save to your Pinterest board or share with friends.


Jessie One-Hour Beanie and Bun Hat
The inspiration for this messy bun beanie came one winter when a woman posted her fun crochet project online – a messy bun hat – and one of my friends tagged me in the post asking if I could make one. At that time (trust me, I searched and searched), there was no pattern available for a hat with an opening in the top to accommodate a ponytail or messy bun.
I thought, “this is brilliant!” And, I went to work creating my own take on this idea. That’s when the vision for the Jessie One-Hour Messy Bun Beanie was born—a hat that keeps you warm while letting your hair flow naturally – and the video demonstration of the hat went viral with over 100 million video views on Facebook.

Since then, this beanie has become a staple in my winter collection. It’s quick to whip up, looks great in a variety of colors, and has received rave reviews from friends and family. Whether you’re crafting for yourself, gifting to friends, or preparing for a craft market, this beanie is sure to become one of your favorite go-to patterns.
And, I’ve updated the pattern with instructions for striping as well as for making it with an elastic closure and without an elastic. Plus, when you grab the downloadable PDF, you’ll also receive instructions for closing up the hat to make a cozy, winter hat with no opening.
Why you’ll love this beanie and bun hat pattern

Skill Level
Easy/Intermediate
Materials
- Lion Brand Hometown USA, super bulky weight #6 yarn. (100% acrylic, 85 yds/74 m per 5 oz/142 g skein)
- 1 skein each Chicago Charcoal (M), Tampa Spice (A), Houston Cream (B), and Dallas Grey (C)
- 9.00 mm (M/N) Crochet Hook
- Scissors
- Sewing needle
- Standard size hair tie (Goody) (optional)
- Branded product tag (optional)
- Printable PDF for the Jessie Bun Hat and Beanie
Gauge
3 HDC rows x 4 HDS sts = 2″ sq.
Sizes/Finished Measurements
Women’s: fits head circumference 20″- 22″
Finished measurement 9″ wide x 8.5″ tall
Stitch Abbreviations
beg – Beginning
CH – Chain
HDC – Half-double Crochet
HDC2TOG – Half-double Crochet two Sts together
RND – Round(s)
SC – Single Crochet
SLST – Slip Stitch
st(s) – Stitch(es)
XST – Cross-stitch (instructions below)
Pattern Notes
- Skill Level: Easy/Intermediate
- US Terminology
- Sts worked through both loops unless otherwise indicated.
- When a row beg with a CH1, it does not count as a st.
- Work one color for solid hat or follow color changes (M, A, B, C) for multi-colored hat.
- Please read through the entire pattern to be sure you understand what’s needed before starting.


More One-Hour Beanies You’ll Love
Special Stitches
HDC Cross-stitch (XST):
Step 1: Skip a st, SLST into the next st and CH2.
Step 2: Yarn over and insert hook into the previously skipped st, draw up a loop, yarn over and draw through all three loops on the hook. (XST made)

HDC 2 sts together (decrease) (HDC2TOG):
Step 1: Yarn over, insert hook in next st, yarn over and pull up loop,
Step 2: Yarn over, insert hook in next st, yarn over and pull up a loop,
Step 3: Yarn over and draw through all loops on hook. Decrease made.


Upgrade to the Ad-free PDF
Get the beautifully formatted, ad-free pattern PDF with instructions to make the either the bun hat or beanie and to add striping while supporting the work of Made with a Twist…thank you!
One-Hour Jessie Bun Beanie Pattern Instructions
With 9.00 mm hook
MAKE THE BRIM
With brim with color M, CH6
ROW 1:(working in the back loop only) SC in 2nd CH from hook and each CH across. (5 SCs)
ROW 2: (working in the back loop only) CH1, turn, SC in each ST across. (5 SCs)
ROW 3 – 34: (working through the back loop only) Repeat ROW 2. (5 SCs)
Band should measure 17 – 17.5″
Seam
CH1, SLST by matching stitches from ROW 1 and RND 34 to create banded collar.

Turn the seam to the inside and turn brim 90 degrees so you’ll be working the next round around the edge of the brim.
RND 1 – color M: CH1, SC into the first st, SC, SC, SC, 2SC, *SC, SC, SC, SC, 2SC* repeat from * to * around 4 more times, SC in the next 4 sts. Join with a SLST to beg SC. (40 SCs)

RND 2 – color A: CH2 (counts as HDC here and throughout), HDC in the next st and each st around. Join with SLST to top of beg CH2. (40 HDCs)
RND 3 – color B: Skip the first st and SLST into the next st, CH2, HDC in the skipped st (XST made). *Skip the next st, HDC in the skipped st.* Repeat from * to * around. Join with SLST to top of beg CH2. (20 XSTs)
RND 4 – color C: Repeat RND 2 (40 HDCs)
RND 5 – color M: Repeat RND 3 (20 XSTs)
RND 6 – color A: (decrease) CH2, HDC in next st, HDC2TOG across the next 2 sts, *HDC in the next
2 sts, HDC2TOG across the next 2 sts,* Repeat from * to * 8 more times. Join with SLST to
top of beg CH2. (30 HDCs)
RND 7 – color B: Repeat RND 3 (15 XSTs)
RND 8 – color C: (decrease) CH2, HDC in next st, HDC2TOG across the next 2 sts, *HDC in the next
2 sts, HDC2TOG across the next 2 sts,* Repeat from * to * 5 more times, HDC2TOG across
the next 2 sts. Join with SLST to top of beg CH2 (22 HDCs)
RND 9 – color M: Repeat RND 3 (11 XSTs)
RND 10 – color M: CH1, (holding the hair tie behind the loops of the previous round and catching the hair tie within the stitches, optional), SC in each stitch around. Join with SLST to beg SC. (22 SCs)
If adding the hair tie (elastic), you will need to stretch the band as the opening is larger than the tie.
Finish off. Tuck ends. Embellish, as desired.
How to Get the Ad-free PDF of this Design
The pattern instructions are available, above, but you can get the beautifully formatted, printable, ad-free PDF for just a few dollars in our Ravelry and Etsy shops.

Suggested Pricing: A Guide for Crochet Sellers
Permission is given (even encouraged) to sell your handmade products created from this original Made with a Twist pattern. I only ask that you give credit to Pam Grice from Made with a Twist as the designer, when possible or appropriate, and link back to www.madewithatwist.com and/or @madewithatwist (on social media) when selling and sharing images online.
Suggested Retail Price

Want your own Crochet Product Pricing Calculator? Well, You’re in luck. You can access a calculator for Crochetpreneur for free RIGHT HERE.
You’ve Got Your Pattern, Now What?

Copyright Notice
This pattern and its images are copyright protected and the sole property of Made with a Twist by Crochetpreneur®, a division of Montgomery Grice Enterprises, Inc. Please do not redistribute, transfer, or sell the pattern, or alter it to claim as your own You may sell any products you create from this pattern. Please credit the designer by linking online listings to www.madewithatwist.com or tagging @madewithatwist.